Category — Sides
Winter Weekend Entertaining Menu
Regular readers here know that for the past year, I’ve been dealing with some bad foot pain. I am so happy to report, however, that I can see the light at the end of the tunnel. Things have improved so much that this weekend I got back into the kitchen for an afternoon of cooking for friends. On the way home from the market on Saturday morning, my car packed with ingredients, I thought to myself “this is what really makes me happy.” I love the creative effort involved in planning a cohesive menu and spending time cooking up tasty food for friends.
This weekend’s menu featured Italian comfort foods, or as D. said, “3 of [his] favorite things: chocolate, wine and beef.”
For munchies, we started out with Robioloa cheese and cranberry pepper jelly on 34 Degrees Natural Crispbread. I also put out an artichoke heart and Parmesan dip that I got at Sevan Bakery, along with some grissini (long, skinny Italian bread sticks) and some pitted green olives with lemon and garlic from Whole Foods.
For dinner, we had short ribs with tagliatelle, which was rich and flavorful and worth the effort. I didn’t make any adjustments at all to this Giada recipe (but for skimming off some of the fat several times during the cooking) and it came out deliciously – the wine and bittersweet chocolate add great depth of flavor.
These ribs are a 3+ hour endeavor, though, so this recipe’s definitely a weekend special-event deal. And although the recipe as written calls for 3 hours of cook-time, mine was closer to 4 – I had some really thick short-ribs. If you decide to tackle these, I’d leave yourself more time because there is NO downside to having your sauce ready while you assemble the rest of your meal – it’ll just get that much more flavorful as it waits.
This fresh salad with red leaf lettuce, radishes, toasted pine nuts and a citrus vinaigrette provided a nice counterpoint to the very rich main dish. I found the recipe in my new Gourmet Today cookbook, but lucky for you, it’s online at Epicurious as well.
I had intended to steam up some broccoli to serve with a little extra-virgin olive oil, Parmesan and red pepper flakes, but that got lost in the shuffle of dinner being overdue.
I also served up some Scali (not homemade, from Formaggio) to mop up sauce, etc.
For dessert, there were assorted amaretti and chocolate-covered butter cookies for the kids and this easy, unexpected and delicious recipe for dried figs with walnuts and mascarpone cheese. I’d make a couple adjustments to this recipe, however. First, if your dried figs are large, I’d halve them. Although they do get more tender in the wine and balsamic syrup, they’re still rather chewy and it’ll be easier going with halves. Next, I think that toasting the walnuts prior to assembling the mix in your baking dish is overkill – the walnuts toast up nicely in the oven. Third, these were good cold, but I think that serving them warm as called for in the recipe would send them to over-the-top deliciousness. The mascarpone is such a nice creamy complement to the sweet and tangy syrupy figs and toasty nuts. It’s a little party in your mouth and a relatively light way to end a rich meal.
Bon appetit!
January 11, 2010 2 Comments
Leftover Magic

I grew up in a ruthlessly frugal household. My parents were the economizers-in-chief of all things, and food was no exception. Apple 3/4 of the way rotten? Still 1/4 left to eat! Limp veggies? Perk ‘em up in ice water! Don’t know what to make for dinner and don’t have much in the house? Get take-out? Nooo! We’ll raid the fridge staples for green peppers and eggs (I’m sure that my almost pathological dislike of cooked green peppers comes from having been fed this meal one too many times).
I am admittedly far less of a tightwad, but I do hate to waste food. Sometimes, I find that all it takes to whip up a quick, cheap meal is a moment or two of opening my mind and foraging in my pantry.
Case in point: I had a lot of leftover cooked whole wheat linguine (I’d say around 4 cups), which L. spontaneously decided she “hates.” I had frozen peas that were gettin’ a little iced-over. I had some whole milk ricotta that didn’t get used for a recipe. And I had some shredded Italian 4-cheese blend threatening to mold. Here’s what I did. [Read more →]
December 4, 2009 3 Comments
For Your Health: Kimchi
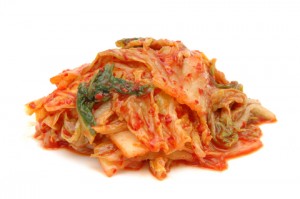
L. was sick for 5 days straight – some dumbed-down version of the swine flu, maybe, or maybe just some other pesky virus. She recovered Monday night, but I felt like I was going down. So I reluctantly cancelled plans to see “Precious” with “the girls,” and went foraging in the fridge for dinner. In my mish-mash-hodge-podge of items was a favorite: Kimchi. ‘Cause as you may remember, when the chips are down for me health-wise, I like to treat my body as best I can . . . and kimchi is pretty much as healthy as it gets.
So . . . what is it? Kimchi is Korea’s most representative food – served at pretty much every meal. Essentially, it’s fermented vegetables – often made with cabbage, radishes, garlic, scallions and leeks, each with its own health benefits. But because it’s fermented, kimchi provides the health benefits of the veggies, plus, it can lower cholesterol, improve digestion, provide essential vitamins and minerals and provide a great, non-dairy source of live probiotics.
You’ve probably heard about probiotics – they’ve been in the news a lot lately. You mostly hear about supplements and yogurt. Probiotics are the beneficial bacteria that aid in maintaining the balance of microorganisms in your body’s intestinal tract. On average, the human digestive system contains more than 400 types of probiotic bacteria. These all serve to inhibit the growth of dangerous bacteria by promoting the health of the digestive system. And did you know that kimchi has more lactic acid bacteria than yogurt? It does!
What can kimchi do for you?
-
Kimchi helps reduce indigestion and gas. Excess bad bacteria causes irritation leading to indigestion, gas and fluid retention.
-
Kimchi may help you feel less hungry. Lactobacillus, one common strain of good bacteria, has been linked to appetite control. Good bacteria helps stabilize blood-sugar levels which means less frequent and less intense hunger.
-
Some studies have shown that kimchi can shorten the duration of a cold.
-
The juice and salt from kimchi helps to keep the intestines clean.
-
The chili peppers and garlic help to lower blood cholesterol and are an aid in blood-clotting.
How do you eat kimchi? Really, any way you like. The other night, I had it with chicken tenders and roasted root veggies. But in addition to eating kimchi as a side dish, it’s also served as kimchi stew, kimchi soup, kimchi dumplings, kimchi stir fried rice, etc. etc. etc.
You can make your own kimchi, but I’m lazy. I get my everyday kimchi at Whole Foods, but if you’re in the area and want an adventure, the new HMart in Burlington has an entire wall of kimchi . . . so you can sample different varieties, with absolutely NO health-downside to your nibbling. What could be better?
November 25, 2009 3 Comments
Make-Ahead Mashed Potatoes
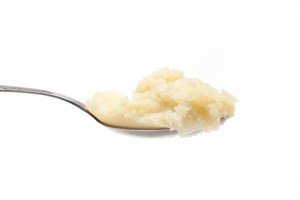
Mmmmm, mashed potatoes and gravy! Can you tell that for me, Thanksgiving is all about the side dishes? Turkey’s OK, but what really gets me fired up are all of the once-a-year traditional foods we eat along with the bird.
These are not light. Not great for you, but they’re a rich, creamy, easy and indulgent holiday side-dish that you can make several days ahead and store in your fridge.
Sarah’s Make-Ahead Mashed Potatoes
5 lbs. yellow or Yukon Gold potatoes, peeled, cooked and mashed 8 oz. cream cheese 8 oz. sour cream 1/2 stick salted butter 1/2 c. whole milk Kosher salt and freshly ground black pepper to taste
Combine the mashed potatoes, butter, cream cheese, sour cream and milk. Add salt & pepper to taste. Mix well and place in a large, oven-proof casserole. Cover and bake at 325 degrees for 50 minutes.
If you do make these ahead and put them in the fridge, removed them from the fridge 30 minutes before you intend to bake them.
Yields 12 servings.
November 18, 2009 2 Comments
Stuffing . . .
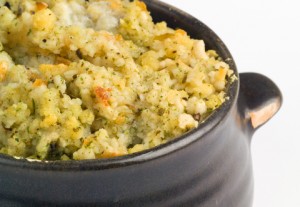
or dressing, or whatever you want to call it, is one of my favorite components of Thanksgiving dinner. Yes, it comes with some debate, as do most things around a holiday. Put it in the bird? Leave it out of the bird? Add meat? Dried fruit? Nuts? None of the above? People get craaaazy about their stuffing preferences.
Here’s what I like. I like either a very simple white bread stuffing with sage, celery, parsley and onions, or else I like a full-frontal assault of oozy, rich sausagey stuffing. More recently, the latter. Either way, I love it most cooked inside the bird, and whatever you do, leave the fruit and nuts out of the picture.
I have 2 stuffing recipes for you today. The simple recipe was my Grandmother Olivier’s recipe, which she called dressing, and which is much loved by all who taste it. It is, of course, not an exact recipe, so you’re going to have to trust your gut on quantities, and you can certainly tweak amounts to your liking. I’ve included my editorial suggestions in brackets. If you make this recipe, please do promise me you’ll set an elegant table. Were Peggy here today, she’d insist on that. [Read more →]
November 17, 2009 6 Comments
Sweet Potato Casserole
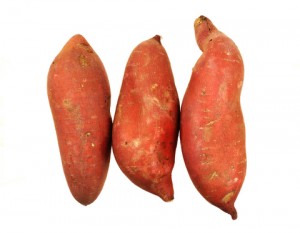
Today’s recipe combines sweet potatoes, another treat from my CSA share, with Thanksgiving: my sure-fire crowd-pleasing Streuseled Sweet Potato Casserole recipe. I make this for every Thanksgiving and people LOVE it. It’s sweet, nutty, and because it’s a riff off an old Cooking Light recipe, it doesn’t break the calorie bank. This is so tasty, I’ve been known to eat this for breakfast the morning after Thanksgiving (yes, leftover pie, too – no one ever said Thanksgiving weekend wasn’t a little bit of a nutritional nightmare). If my SIL wants me to, I’ll make it this year, too, but I’ll use the local sweet potatoes I got in my share . . . sure to increase the deliciousness.
Streuseled Sweet Potato Casserole
5 lbs. sweet potatoes, peeled and cut into 1-inch cubes 1/2 c. half-and-half 1/2 c. maple syrup 1 t. vanilla 3/4 t. salt 1 large egg, lightly beaten Cooking spray 1/2 c. all-purpose flour 1/2 c. brown sugar 1/4 c. chilled unsalted butter, cut into small pieces 1/2 c. chopped pecans
Preheat the oven to 375 degrees. Place the potatoes in a Dutch oven and cover with water. Bring to a boil, then reduce the heat and simmer for 12 minutes, or until tender; drain. Using a stand mixer, whisk the half-and-half with the next 4 ingredients (through eggs). Change to the paddle attachment, add the potato to the egg mixture, and beat at medium speed until smooth. Spoon the potato mixture into a 9×13-inch baking dish coated with cooking spray. Combine the flour and sugar in a food processor; pulse to combine. Add the chilled butter, pulse until the mixture resembles coarse meal.
Toast the pecans in a small, dry skillet. Stir the pecans into the flour and sugar mixture and sprinkle this over the potato mixture. Cover and bake for 15 minutes, then uncover and bake an additional 25 minutes or until the topping is browned and the potatoes are thoroughly heated.
This will yield 18 1/2-cup servings.
If you want to make this ahead of time – make up your potato mixture and store it in the fridge in an airtight container for up to 2 days. Make up the streusel mixture and store it in a separate airtight container. When you’re ready to bake, put the potatoes in your baking dish, top with the streusel, and you’re good to go.
What if you don’t have a stand mixer? Not to worry – you can use a hand mixer or some serious elbow grease and a potato masher. No food processor? Cut the butter into the flour and sugar mixture with two knives.
Have a great weekend, all!
November 13, 2009 2 Comments
Lentils With Butternut Squash & Walnuts

More cooking inspired by my CSA loot – last night I used local butternut squash and cilantro, and man, this recipe is terrific! Sorta sweet from the squash, sorta zingy and a little spicy from the curry powder, nice toasty crunch thanks to the walnuts and nice, brite topnotes provided by the lime juice and cilantro. A party in your mouth . . . and your belly, because every darn thing in here is great for your body. This took about 40 minutes to prepare – that’s an outside estimate, which includes running into the living room twice to assist in the selection of an appropriate television show for L. Your cooking time may vary . . . .
Lentils With Butternut Squash & Walnuts
1 small butternut squash (or 1/2 of a squash – you need about 1 pound) 1 large shallot, minced 2 T. extra-virgin olive oil 1 1/2 t. curry powder 1/2 c. walnuts 1 1/2 c. low-sodium chicken broth 1/3 c. lentils (I used Pardina lentils, but brown are a good substitute) 2 T. chopped fresh cilantro sprigs Juice of 1/2 lime
Preheat the oven to 425 degrees. Halve, peel and seed squash and cut it into 1/2-inch pieces. In a 9×13-inch baking dish, toss the shallot with the squash, oil, curry powder, and salt and pepper to taste until combined well. Bake squash mixture in middle of oven until almost tender, about 20 minutes.
While the squash is baking, boil the chicken broth in a small saucepan, add the lentils, and cook until the lentils are just tender but not falling apart, about 20 minutes. Drain lentils in a sieve and transfer to a bowl.
Chop the walnuts and place them in a small, dry frying pan. Toast the walnuts over low-medium heat, stirring constantly.
To the lentils add the squash mixture, cilantro, lime juice, toasted walnuts and salt and pepper to taste and toss until combined well.
The original recipe says that this serves 2 as a side dish, but that’s a big portion of what I’d consider a very hearty side dish! I ate 1/2 of this recipe as my main course and was quite full . . . you could even serve this with brown rice or quinoa to stretch it out a bit if you like.
A note on toasting nuts: did you know that if you toast your nuts before adding them to recipes it’ll boost their flavor? All you need is a few extra minutes and a dry skillet. Toast the nuts over low heat, and stir them constantly. Watch them closely because they’ll toast all-of-a-sudden and can burn just as quickly!
November 12, 2009 4 Comments
Baked Apple Sauce and Braised Red Radishes
I’m straying from my promised Thanksgiving prep theme here – let me know if you want me to veer back . . . I’m just having so much fun with all these vegetables. When I started my gig as a stay-at-home mom (which as many of you know, I NEVER in a million years thought I would do), I found (still do) great pleasure and intellectual stimulation in seeking out new ways to cook different foods. This share’s brought back that old feelin’ again – yesterday’s challenge was what do I do with 10 lbs. of apples and I don’t love radishes, what to do?
L. loves applesauce. She also loves to cook – so the logical solution to the too many apples problem was applesauce (better for mama not to have a pie, or apple goodie around the house anyway). This easy recipe was our afternoon activity yesterday – peeling apples is a kid-friendly task, as is MASHING. Kids love to mash. Who can blame ‘em? (BTW, still have 8 apples left . . . hmmmmm).
Baked Apple Sauce
10 large apples, cored peeled and sliced 3/4 c. sugar 1 1/4 t. ground cinnamon 1 1/4 t. vanilla extract
Set aside 2 9×13-inch baking dishes. Place the apples in the dishes, dividing evenly between the two dishes. In a small bowl combine the sugar, cinnamon and vanilla; mix well. Sprinkle over apples. Cover each dish with foil and bake at 350 degrees for 40-45 minutes or until apples are tender. Uncover and mash with a fork or a potato masher. This stuff is SO delicious. Depending on your tastes and what sort of apples you use, you can play with the amount of sugar. This is sweet as is, but not sickeningly so. It’d be great on oatmeal, atop some fat-free Greek yogurt, mixed into wholegrain pancake batter (or on top of pancakes), as an accompaniment to latkes, etc. etc.
Next task was radish rescue. I’ve never been a fan of radishes – I mean, they’re OK, but I’d never buy some to nosh – only to make a salad look pretty or to use as garnish. I had a beautiful bunch of bright red radishes from the CSA share . . . so I consulted Deborah’s Madison’s Vegetarian Cooking For Everyone and made up this little ditty. Cooked radishes are much mellower than their raw cousins - I like them a lot better. The thyme in this went nicely with my leftover lentil soup.
Braised Red Radishes
1 bunch red radishes (approximately 10) 1 T. extra-virgin olive oil 1 shallot, minced Several pinches of dried thyme Kosher salt & freshly ground black pepper to taste Low-sodium chicken brothTrim the leaves from the radishes and scrub them clean. Leave small radishes whole and halve or quarter the larger ones – you are aiming for uniform size (and therefore cooking time) here. Heat the olive oil in a saute pan and add the shallot and the thyme and cook for 1 minute on medium heat. Add the radishes, a bit of salt and pepper and enough chicken broth to cover the radishes about halfway. Cover and simmer, stirring every 5 minutes or so, until the radishes are tender, about 20 minutes. Remove the radishes to a serving dish. Boil the remaining liquid (there won’t be much left) until only a little bit remains – it’ll be a lovely pinkish color and will be loaded with shallot and studded with the thyme. Pour this over the radishes, taste for salt and pepper and add more if you wish, and serve. Serves 2.
November 11, 2009 No Comments


